The Yachting Monthly panel of experts have come together to provide you their best tops for improvements on deck

When we at Yachting Monthly review new and used boats, one of the key things our testers are looking at is the deck layout and how the setup helps or hinders potential buyers. Of course irrespective of the on deck layout straight from the factory, there are always improvements on deck that you can make, to get your yacht working better for you.
We’ve gathered together our panel of expert cruisers to provide their top tips on making improvements on deck for a wide variety of boat types and sailing styles.
Stay dry with vent covers – Randall Reeves
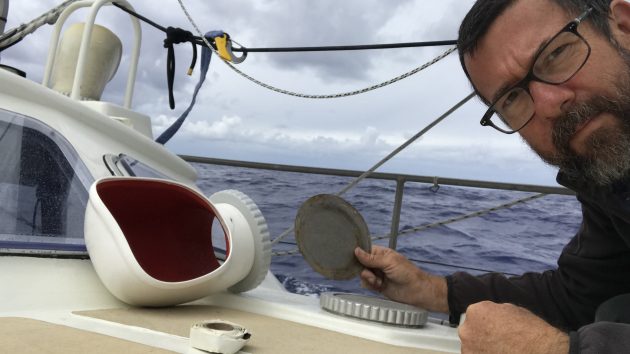
Stainless steel covers can help keep water out of the vents while underway. Credit: Randall Reeves
Dorade vents are a wonder of engineering, but even they can be overwhelmed by heavy, breaking seas.
To forestall this bit of nastiness, my 45ft sloop Mo has stainless steel covers that fit under the vent compression ring and make the vent nearly water tight.
I say ‘nearly’ because most Dorade boxes have a drain hole at the bottom which can still let in some tiny amounts of water in really rough conditions, so stuffing a rag into the vent from below remains a smart idea.
Best way to mount radar – Christopher Smith
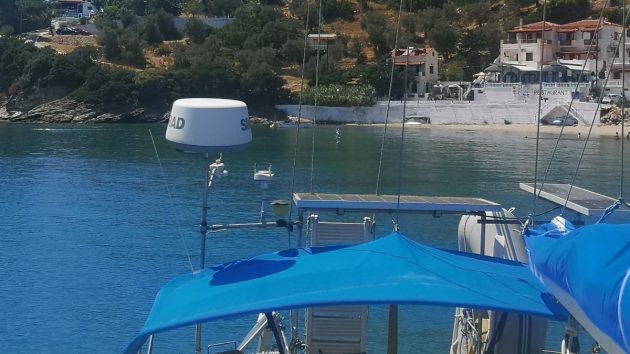
Putting your radar lower down the mast makes it easier to fit. Credit: Christopher Smith
Is mounting your radar as high up the mast as possible really best?
That way the radar can see the furthest: at 20 metres, the horizon is over eight miles but from eye level in the cockpit the horizon is three miles.
Do you really need to see further with your radar than you can see by eye on a clear day?
Large distant objects will still show above the horizon either by eye or low-mounted radar.
What you really need in fog is high-quality close-in information – so use a broadband radar mounted where you can service it and not up the mast where it regularly catches the jib each time you tack, as well as reducing your boat’s stability.
Finally, mounting at low level is easier to do: I used a polyethylene breadboard from a kitchen shop screwed to stainless steel tubing.
Fitted eight years ago, our radar is still good.
Rod not ropes for tiller security – Andy du Port
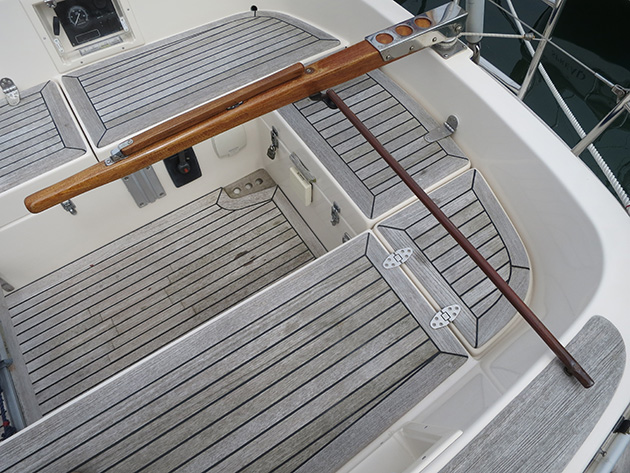
Using doweling rather than rope will keep your tiller secure. Credit: Andy du Port
Securing the tiller when alongside or on a buoy can be a problem.
To hold it firmly, rope lashings need to be quite far forward to prevent any movement, they restrict space in the cockpit and can be fiddly to rig.
If the tiller is raised and lashed to the backstay, it will inevitably wave about in all but the calmest of conditions – and it can still be awkward to set up.
We have used the arrangement shown in the photo for many years. There is no movement, even in strong streams or stormy weather, and almost all of the cockpit is unencumbered.
It comprises a suitable length of doweling with a drilled recess on the inboard end, and a bolt which is a snug fit in the autopilot socket at the other.
Some electrical tape round the bolt will stop any rattling.
It takes just a few seconds to set up or remove – and it helps if you already have the appropriate fittings for an autopilot already installed.
Cockpit lockers: secure ashore and at sea – Harry Dekkers
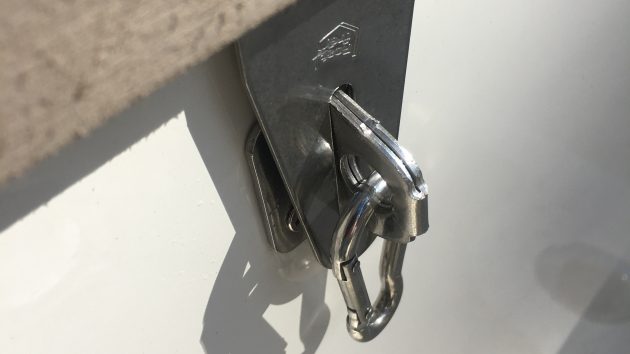
Using a carabiner allows for quick and easy access. Credit: Harry Dekkers
When you leave your yacht, you want to lock it, and that includes the cockpit lockers.
But what if you are at sea, especially when sailing in rough water?
When at sea I use carabiner hooks: it secures the cockpit locker but it means that I can still open it quickly.
Keeping Father Time at bay! – Jim Hepburn
Installing gates on the guardrails has made access much easier for Algol‘s crew. Credit: Jim Hepburn
After the crew had hip and knee operations, we needed to do something with the guardrails on my Beneteau Evasion 37, Algol.
The easy answer was to install gates either side, but the project got a bit bigger.
We encapsulated the toe rails in teak and then mounted the new gates and stanchions on top.
The guardrail wires then had to be shortened, and gate closure wires installed on both sides; they were snap shackled for easy access from the pontoon or dinghy.
The gates and stanchion base sockets were screwed through the teak cap rails into the side teak boards for strength using 6mm x 50mm stainless steel pan heads.
The gate frames and stanchions were sourced from Germany. The ferrules, eyes and snap shackles for shortening the guardrail wires were from the UK.
I reused the existing stainless steel wires to make the closure gate wires.
I had to make up a simple wire crimper to hydraulic swage the new ferrules onto the stainless steel wires.
Homemade Bimini for a narrow-sterned yacht – William Schotsmans
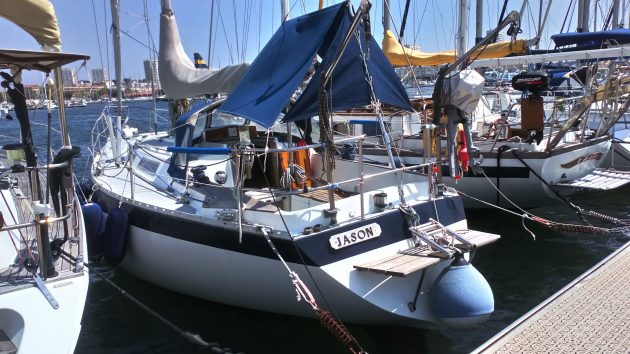
William made his own bespoke bimini as he couldn’t find one to fit his narrow sterned Gladiateur 33. Credit: William Schotsmans
Finding an affordable conventional bimini for our Gladiateur 33 Jason, was impossible.
The stern is narrow and walking in and out through the pushpit is a hurdle race.
The gap between the tip of the boom and the backstay is 0.5m and it is necessary to have an extension behind the backstay.
I am also 6ft tall. In the end, we improvised and made our own.
It consists of a stainless steel rod articulated on the backstay with a welded padeye on the forepart to clip to a topping lift.
The topping lift runs through a block fitted to the backstay and it is made fast on the pushpit. The canvas is connected to the pushpit and the two aft stanchions.
The materials cost me £100.
Since installing it 15 years ago, the bimini has sustained 18 knots of upwind breeze and 40 knots of downwind.
We improved the system last year with two triangular panels. With the tender on its davits and the addition of a small parasol, the cockpit is semi-enclosed.
It can be dismantled in seconds. If stormy when moored, I undo the bimini and rig it above the forehatch.
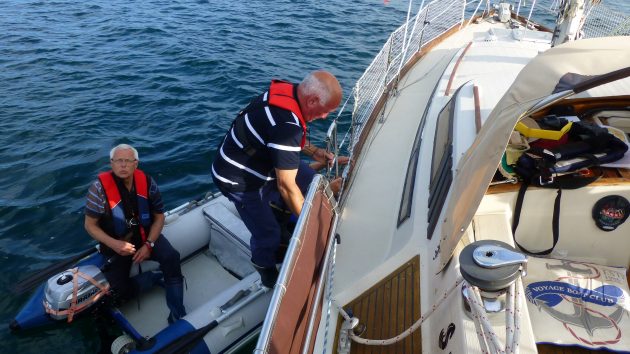
Easy guard rail release in a crisis – Harry Dekkers
Replacing part of the guard wires with line makes it easy to release in an emergency. Credit: Harry Dekkers
Guard wires designed to keep you and your crew on board can get in the way when retrieving a MOB.
The solution is to make a shackle which you can unhook, or fix the aft end of the wire with a line, which will be easy to cut.
It is also a simple and cheap repair afterwards, and that is a rare thing with sailing!
Think about your VHF position – Harry Dekkers
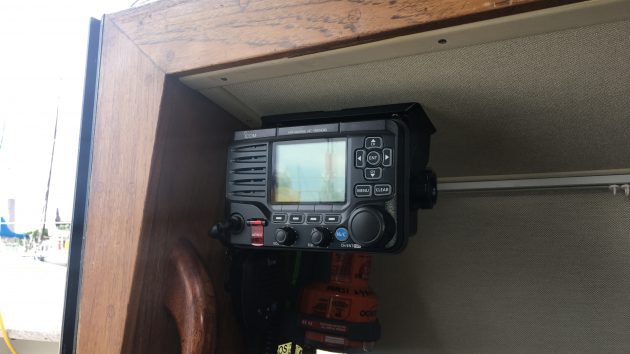
Installing a fixed VHF in the companionway will ensure you have high power continually. Credit: Harry Dekkers
Many yachts have two VHFs: a fixed one in the cabin and a handheld one in the cockpit.
Both have their advantages.
I prefer a different set-up and I have installed my fixed VHF just inside my companionway – that way I am able to listen to and communicate on VHF, on high power, while remaining in the cockpit and being able to see what is going on around me as I sail.
Easy cockpit cushions – Oliver Perkins

Around three metres of pipe insulation is needed for each cushion. Credit: Oliver Perkins
We have a lovely set of non-waterproof cockpit cushions, but we can’t have them out at sea in case they get wet.
To solve this problem, I made cushions out of pipe insulation.
They don’t look nearly as good as our fabric ones, but they are completely waterproof, dry quickly, are very comfortable and have lasted years.
Each cushion needs about three metres of pipe insulation. Just cut them into seven 40cm lengths and thread a rope through holes in the insulation a few times.
I found it easiest to heat a metal rod and melt the holes into the insulation.
A lighter companionway – John Willis
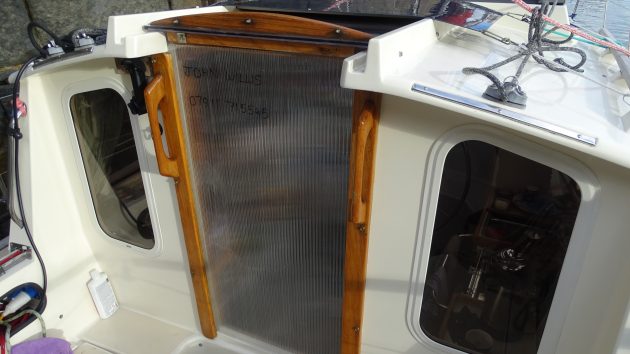
Made from polycarbonate roofing material, the new companionway lets in more light down below. Credit: John Willis
Pippin is a Francis 34 Pilothouse and I’ve been her custodian since 2017.
Since that time we have sailed thousands of miles together.
On every trip I have fitted the ‘Willis lightweight companionway door’ before I set off, which is nothing more than a scrap sheet of 6mm polycarbonate roofing material, cut to fit the companionway entrance.
It replaces three heavy wooden washboards, which have no proper home, other than buried in a locker.
I can even scramble in and out without removing it, by sliding it up just far enough.
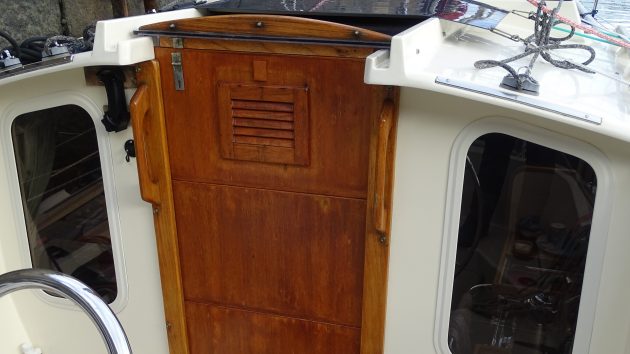
Pippin’s original companionway was made of three heavy wooden washboards. Credit: John Willis
I have fallen against it, tripped over it, bent it nearly in half and still it comes back for more.
It has been in all sorts of conditions up to gale force, when I use a short cord attached through a hole in its bottom to secure it in place and to stop it blowing away when I remove it in windy conditions.
Being transparent it lets in a lot of light whilst still providing privacy, and I can also use it to scribble notes on with my chinograph pencil.
It cost less than a decent large glass of wine and took about five minutes to measure up and cut with a portable jigsaw.
Future enhancements? I toyed with the idea of using 8,, sheet, but I can’t even destroy the 6mm stuff, so I see little point.
Frankly, I would not be without it now.
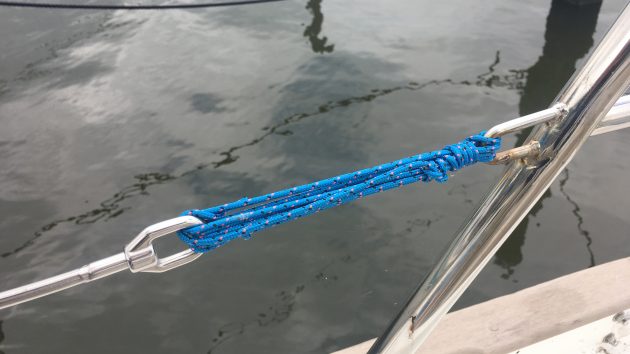
The Knotted Rope – Graham Walker

A permanent 2m knotted rope makes transfer from tender to yacht easier in swell. Credit: Graham Walker
We’d just made landfall after 3,000 miles, and with the boat tidied up were eager to get ashore to that long-awaited pub.
There was a fair swell, quite a breeze and the dinghy was bucking like a bronco.
Three of us made it, but the fourth found himself with his feet in the dinghy and arms on the pushpit with a sudden, ever-widening gap, until he finally collapsed gracefully into the water.
Well, we now have a strong, 2m-long knotted rope permanently attached just above the sugar scoop on our OVNI 395.
This gives us something firm to hold onto when making the transfer between a rolling boat and a plunging tender.
It works well both lowering yourself in and heaving yourself out of the dinghy, and is helpful if waves are making the transfer difficult – or on the way back from the pub!
The advantages of an antenna pole – Harry Dekkers
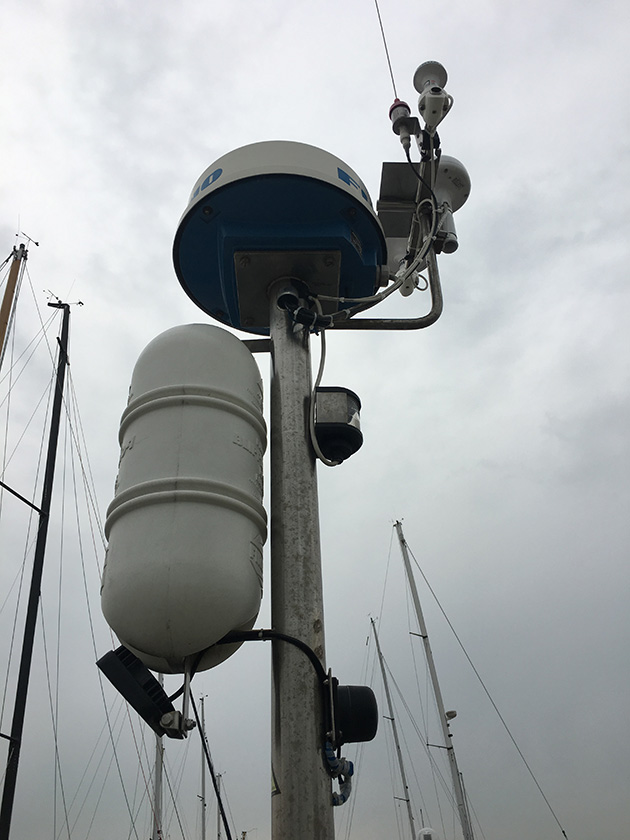
An antenna pole can be used instead of a mast to mount receivers and lights. Credit: Harry Dekkers
As with my former boat I have installed an antenna pole on my Nicholson 35.
The basis of the pole is a stainless (preferably 316) pipe, the size of my spinnaker pole, which I installed on a solid mount on deck.
This pole has many advantages.
I use it to mount my radar antenna, as it avoids making holes in the mast and it keeps the weight down. This gives me a 12-mile range which I am more than happy with.
I need the radar most when there is fog, when the wind and the waves are generally limited.
Besides the radar antenna you can mount all radio receivers for AIS, FM or DAB+ radio and GPS.
The VHF antenna I still mount on the top of the mast because I want to have the maximum range.
You can also mount your stern light on the pole, (which keeps it above your flag, which is useful when night sailing), a cockpit or deck light and your anchor light.
In this position the anchor light will be seen better at a shorter range, especially when you are at anchor in the vicinity of land with all of its light.
You can also mount your radar reflector on the front of the pole directly below the radar, which avoids you having to make unsightly holes in the mast.
Multipurpose cabin cover – Harry Dekkers
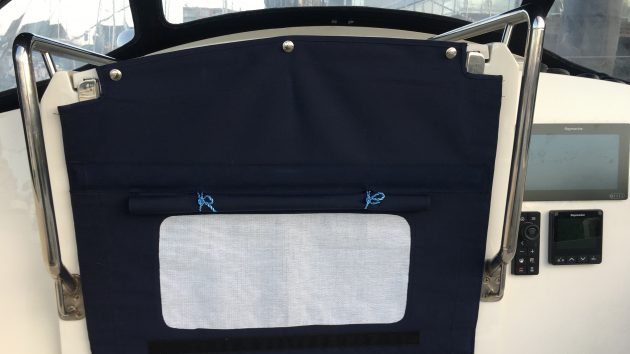
A cabin cover provides privacy as well as protection from the elements. Credit: Harry Dekkers
When sailing, I find this multipurpose ‘cabin cover’ to be very useful.
In heavy rain from astern, the cover can be lowered to close the cabin from the elements while still providing easy, quick access to the cabin.
There are two horizontal sail battens incorporated into the cover to prevent it from blowing into the cabin.
It can also be lowered at night or when crew are sleeping to provide privacy as well as sufficient ventilation.
It can be easily made up by a sail maker or even yourself if you are good with a needle and thread.
Enjoyed reading this?
A subscription to Yachting Monthly magazine costs around 40% less than the cover price.
Print and digital editions are available through Magazines Direct – where you can also find the latest deals.
YM is packed with information to help you get the most from your time on the water.
-
-
- Take your seamanship to the next level with tips, advice and skills from our experts
- Impartial in-depth reviews of the latest yachts and equipment
- Cruising guides to help you reach those dream destinations
-
Follow us on Facebook, Twitter and Instagram.
The post Expert advice: improvements on deck appeared first on Yachting Monthly.


